 Planting the post Securing to the post
Installing
low pedestrian fence, trellis,
willow edging and
bamboo edging border is simple.
There are several options for installing your trellis
and edging in the garden. You can use metal posts, wooden stakes, metal rods, or
plastic rods. Make sure that whatever you choose is sunk 16 to 18 inches into
the ground for and 8' trellis so that the trellis is secure, for shorter edging,
8 to 10 inches is fine.
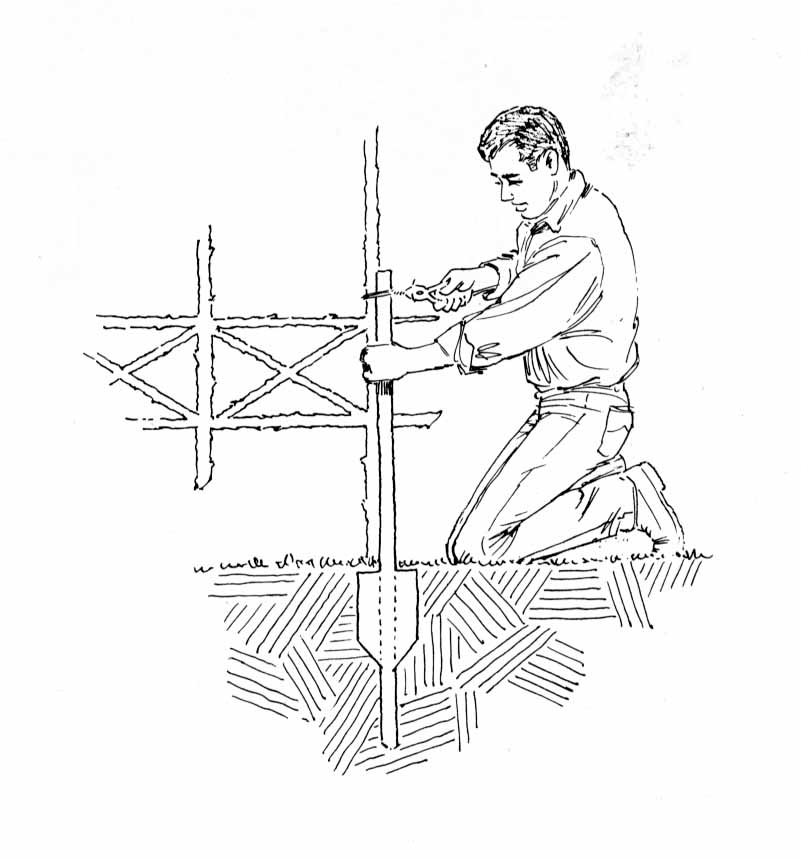
Driving in the post
With a heavy hammer, drive one post or stake into the ground at the
approximate point where one of the trellis upright or first leg of the edging
will be. Hold one trellis or edging upright against the post you have just
driven and mark the spot where the other touches the ground. Set the trellis or
edging aside.
Where you marked the spot, drive the second post into the
ground to approximately the same depth as the first one. And repeat the same
process if you need more than two stakes, such as in the case of our 6' long
edging.
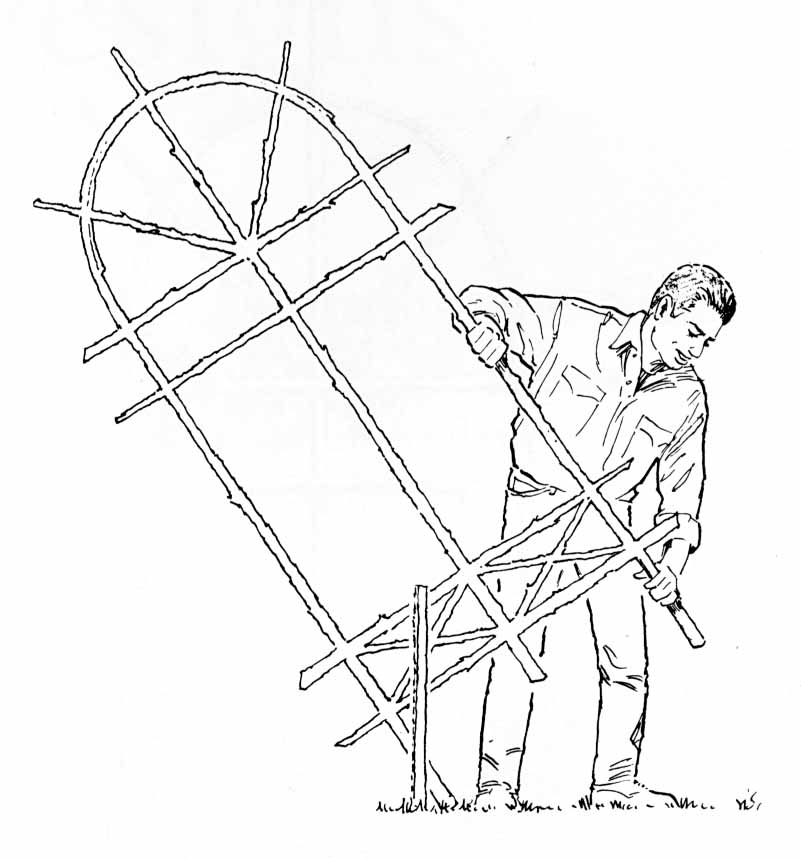
Wiring the trellis or edging to the
post
Position the trellis or the edging against the posts, with the trellis or edging
upright in the front of the posts. Find a spot 3" to 4" from the top of the
post and wire it upright to the post at this point. Then firmly wire the bottom
upright to the post 3" from the ground. You should now have one trellis
or edging upright wired securely to one post.
Repeat the same process with the other post, securely wiring
the trellis or edging in place.